When you develop a web app or a mobile app with Django, it is common to use the Django REST Framework for communication with the server-side. The client-side makes GET, POST, PUT, and DELETE requests to the REST API to read, create, update, or delete data there. The communication by Ajax is pretty uncomplicated, but how would you upload an image or another file to the server? I will show you that in this article by creating user avatar upload via REST API. Find the full code for this feature on Github.
Extend Django User model
We will start by installing Pillow for image handling to the virtual environment using the standard pip command:
(venv)$ pip install PillowCreate accounts app with a custom User model:
# myproject/apps/accounts/models.py
import os
import sys
from django.db import models
from django.contrib.auth.models import AbstractUser
from django.utils import timezone
from django.utils.translation import gettext_lazy as _

def upload_to(instance, filename):
    now = timezone.now()
    base, extension = os.path.splitext(filename.lower())
    milliseconds = now.microsecond // 1000
    return f"users/{instance.pk}/{now:%Y%m%d%H%M%S}{milliseconds}{extension}"

class User(AbstractUser):
    # …
    avatar = models.ImageField(_("Avatar"), upload_to=upload_to, blank=True)
You can add there as many fields as you need, but the noteworthy part there is the avatar field.
Update the settings and add the accounts app to INSTALLED_APPS, set the AUTH_USER_MODEL, and the configuration for the static and media directories:
# myproject/settings.py
INSTALLED_APPS = [
    # …
    "myproject.apps.accounts",
]

AUTH_USER_MODEL = "accounts.User"

STATICFILES_DIRS = [os.path.join(BASE_DIR, "myproject", "site_static")]
STATIC_ROOT = os.path.join(BASE_DIR, "myproject", "static")
STATIC_URL = "/static/"
MEDIA_ROOT = os.path.join(BASE_DIR, "myproject", "media")
MEDIA_URL = "/media/"
Next small steps:
- Create and run migrations with the
makemigrationsandmigratemanagement commands. - Set up the custom model administration for the new User model.
- Create the superuser with the
createsuperusermanagement command.
Install and configure Django REST Framework
Install Django REST Framework for the REST APIs to your virtual environment, as always, using pip:
(venv)$ pip install djangorestframeworkWe'll be using authentication by tokens in this example. So add Django REST Framework to INSTALLED_APPS in the settings and set TokenAuthentication as the default authentication in the REST_FRAMEWORK configuration:
# myproject/settings.py
INSTALLED_APPS = [
    # …
    "rest_framework",
    "rest_framework.authtoken",
    # …
]

REST_FRAMEWORK = {
    'DEFAULT_AUTHENTICATION_CLASSES': [
        'rest_framework.authentication.TokenAuthentication',
    ]
}
Prepare the serializer and the view
In Django REST Framework, serializers are used for data validation, rendering, and saving. They are similar to Django forms. Prepare UserAvatarSerializer for avatar uploads:
# myproject/apps/accounts/serializers.py
from django.contrib.auth import get_user_model
from rest_framework.serializers import ModelSerializer
User = get_user_model()

class UserAvatarSerializer(ModelSerializer):
    class Meta:
        model = User
        fields = ["avatar"]

    def save(self, *args, **kwargs):
        if self.instance.avatar:
            self.instance.avatar.delete()
        return super().save(*args, **kwargs)
Now create an API view UserAvatarUpload for avatar uploads.
# myproject/apps/accounts/views.py
from rest_framework import status
from rest_framework.parsers import MultiPartParser, FormParser
from rest_framework.permissions import IsAuthenticated
from rest_framework.response import Response
from rest_framework.views import APIView
from .serializers import UserAvatarSerializer

class UserAvatarUpload(APIView):
    parser_classes = [MultiPartParser, FormParser]
    permission_classes = [IsAuthenticated]

    def post(self, request, format=None):
        serializer = UserAvatarSerializer(data=request.data, instance=request.user)
        if serializer.is_valid():
            serializer.save()
            return Response(serializer.data, status=status.HTTP_200_OK)
        else:
            return Response(serializer.errors, status=status.HTTP_400_BAD_REQUEST)
Make sure that the view uses MultiPartParser as one of the parser classes. That's necessary for the file transfers.
Prepare the URL configuration
In the URL configuration, we will need those URL rules:
- The path for the index page. Let's make it a direct
TemplateView. - The path for logging in by user credentials and obtaining the authentication token.
- The path for user avatar upload.
- The path for model administration.
- The path for static URLs.
- And finally, the path for media URLs.
# myroject/urls.py
from django.conf.urls.static import static
from django.contrib import admin
from django.urls import path
from django.views.generic import TemplateView
from django.conf import settings
from myproject.accounts.views import UserAvatarUpload
from rest_framework.authtoken.views import obtain_auth_token

urlpatterns = [
    path("", TemplateView.as_view(template_name="index.html")),
    path("api/auth-token/", obtain_auth_token, name="rest_auth_token"),
    path("api/user-avatar/", UserAvatarUpload.as_view(), name="rest_user_avatar_upload"),
    path("admin/", admin.site.urls),
]

urlpatterns += static(settings.STATIC_URL, document_root=settings.STATIC_ROOT)
urlpatterns += static(settings.MEDIA_URL, document_root=settings.MEDIA_ROOT)
Prepare the frontend HTML and JavaScript
I will illustrate the frontend using Bootstrap HTML and Vanilla JavaScript. Of course, you can implement the same using ReactJS, Vue, Angular, or other JavaScript framework and any other CSS framework.
The template for the index page has one login form with username and password or email and password fields (depending on your implementation), and one avatar upload form with a file selection field. Also, it includes a JavaScript file avatar.js for Ajax communication.
{# myproject/templates/index.html #}
<!doctype html>
{% load static %}
<html lang="en">
<head>
    <meta charset="utf-8">
    <meta name="viewport" content="width=device-width, initial-scale=1, shrink-to-fit=no">

    <link rel="stylesheet" href="https://stackpath.bootstrapcdn.com/bootstrap/4.4.1/css/bootstrap.min.css"
          integrity="sha384-Vkoo8x4CGsO3+Hhxv8T/Q5PaXtkKtu6ug5TOeNV6gBiFeWPGFN9MuhOf23Q9Ifjh" crossorigin="anonymous">

    <title>Hello, World!</title>
</head>
<body>
<div class="container">
    <div class="row">
        <div class="col-md-8">
            <p class="text-muted my-3"><small>Open Developer Console for information about responses.</small></p>
            <h1 class="my-3">1. Log in</h1>
            <form id="login_form">
                <div class="form-group">
                    <label for="id_email">Email address</label>
                    <input type="email" class="form-control" id="id_email" aria-describedby="emailHelp"
                           placeholder="Enter email"/>
                </div>
                <div class="form-group">
                    <label for="id_password">Password</label>
                    <input type="password" class="form-control" id="id_password" placeholder="Password"/>
                </div>
                <button type="submit" class="btn btn-primary">Log in</button>
            </form>

            <h1 class="my-3">2. Upload an avatar</h1>
            <form id="avatar_form">
                <div class="form-group">
                    <label for="id_avatar">Choose an image for your avatar</label>
                    <input type="file" class="form-control-file" id="id_avatar"/>
                </div>
                <button type="submit" class="btn btn-primary">Upload</button>
            </form>

        </div>
    </div>
</div>
<script src="{% static 'site/js/avatar.js' %}"></script>
</body>
</html>
Last but not least, create the JavaScript file avatar.js. It contains these things:
- a global variable to store the user token. In the real-world application, you would probably save the token in a cookie or local storage.
- a login-form submit handler which posts user credentials to the server and retrieves the authentication token.
- an avatar-form submit handler which posts the selected file and the token to the server and retrieves the path of the saved file on the server.
// myproject/site_static/site/js/avatar.js
let userToken;

document.getElementById('login_form').addEventListener('submit', function(event) {
    event.preventDefault();
    let email = document.getElementById('id_email').value;
    let password = document.getElementById('id_password').value;

    fetch('http://127.0.0.1:8000/api/auth-token/', {
        method: 'POST',
        headers: {
            'Content-Type': 'application/json',
        },
        body: JSON.stringify({
            "username": email,
            "password": password,
        })
    }).then( response => {
        return response.json();
    }).then(data => {
        console.log(data);
        userToken = data.token;
        console.log('Logged in. Got the token.');
    }).catch((error) => {
        console.error('Error:', error);
    });
});

document.getElementById('avatar_form').addEventListener('submit', function(event) {
    event.preventDefault();
    let input = document.getElementById('id_avatar');

    let data = new FormData();
    data.append('avatar', input.files[0]);

    fetch('http://127.0.0.1:8000/api/user-avatar/', {
        method: 'POST',
        headers: {
            'Authorization': `Token ${userToken}`
        },
        body: data
    }).then(response => {
        return response.json();
    }).then(data => {
        console.log(data);
    }).catch((error) => {
        console.error('Error:', error);
    });
});
In the JavaScript file, we are using fetch API for the REST API requests. The noteworthy part there is the FormData class that we use to send the file to the server.
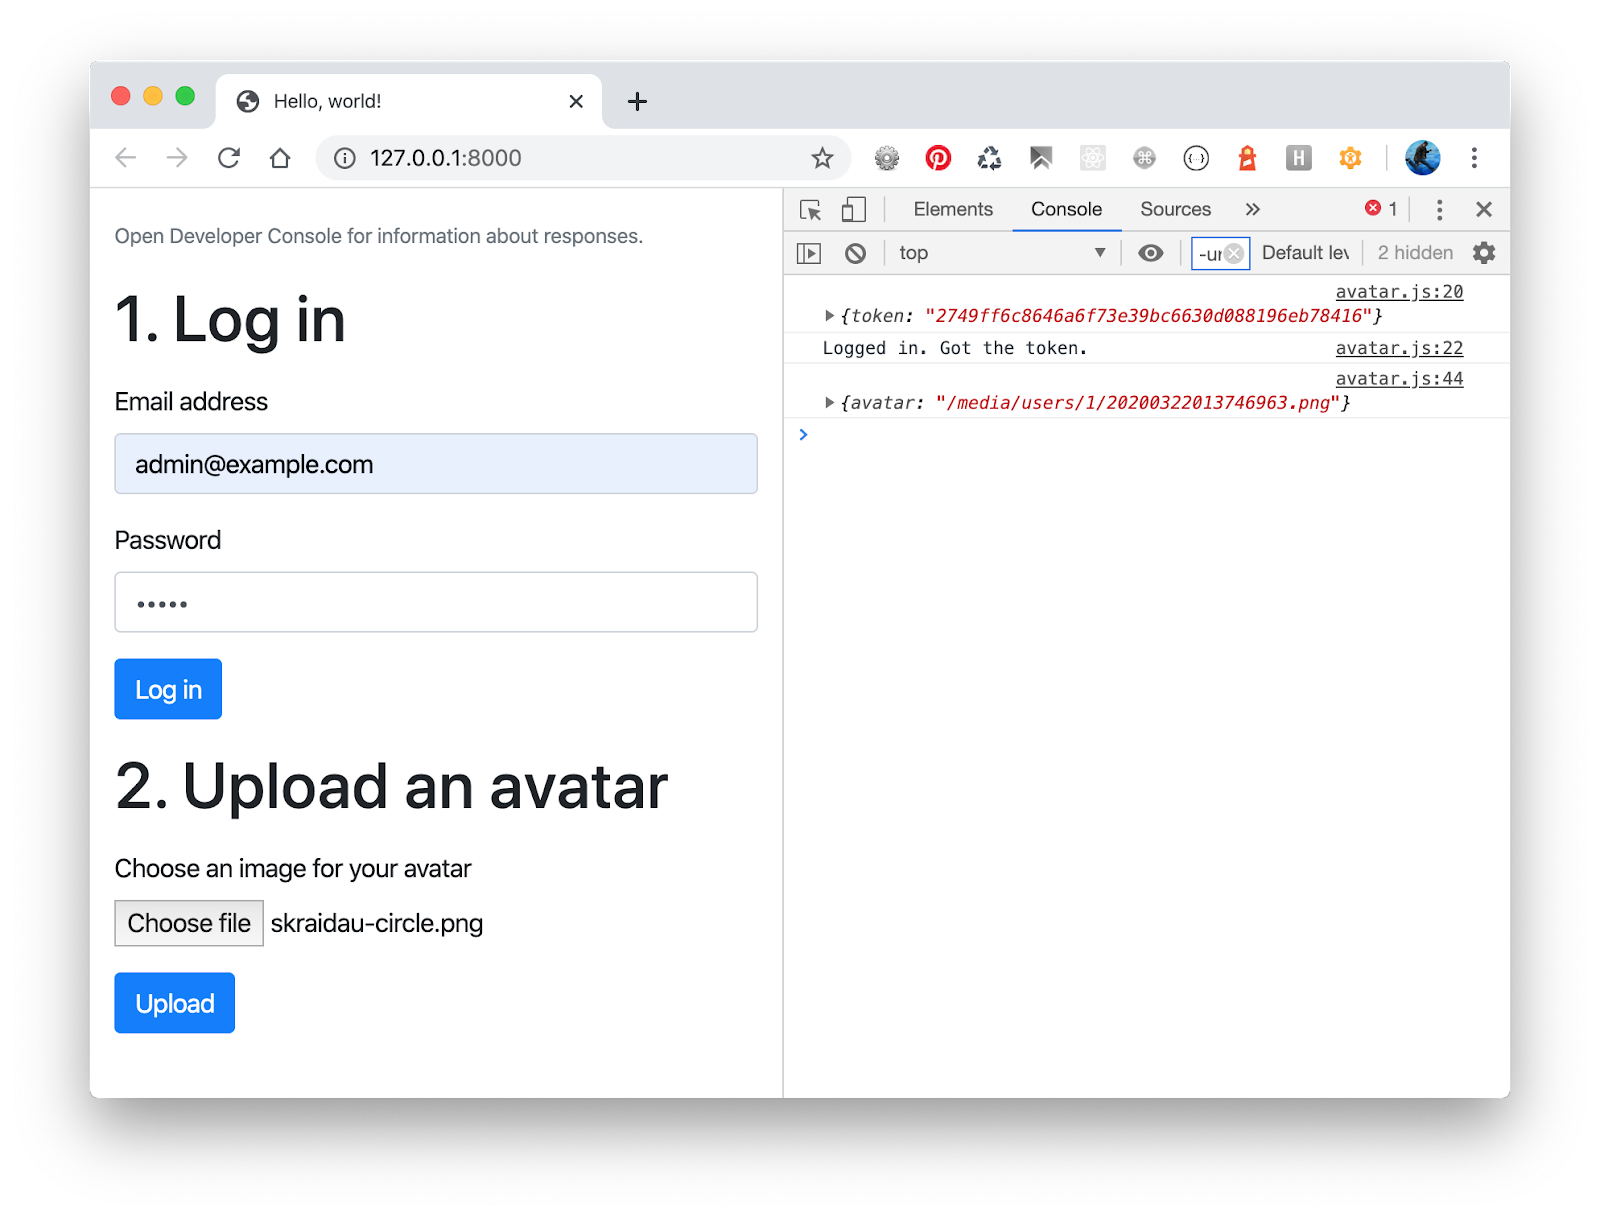
Now run the local development server and go to the http://127.0.0.1:8000. There you will have something like this:
Final Thoughts
As more than a half Internet usage happens on mobile devices, there is a demand to switch from usual HTML websites and platforms to mobile apps. Whether you create a native mobile app, a hybrid app, or Progressive Web App, you will likely have to communicate with the server via REST API or GraphQL. It is pretty clear how to transfer textual data from and to a remote server. But after this exercise, we can also transfer binary files like images, PDF or Word documents, music, and videos.
Happy coding!
Cover Photo by Dan Silva