I like django-crispy-forms. You can use it for stylish uniform HTML forms with Bootstrap, TailwindCSS, or even your custom template pack. But when it comes to custom widgets and dynamic form handling, it was always a challenge. Recently I discovered htmx. It's a JavaScript framework that handles Ajax communication based on custom HTML attributes. In this article, I will explore how you can use django-crispy-forms with htmx to provide a form with server-side validation in a modal dialog.
The setup
For this experiment, I will be using these PyPI packages:
- Django - my beloved Python web framework.
- django-crispy-forms - library for stylized forms.
- crispy-bootstrap5 - Bootstrap 5 template pack for django-crispy-forms.
- django-htmx - some handy htmx helpers for Django projects.
Also, I will use the CDN versions of Bootstrap5 and htmx.
The form
I decided to add some crispy style to the login form by extending Django's authentication form and attaching a crispy helper to it.
from django.contrib.auth.forms import AuthenticationForm
from crispy_forms.helper import FormHelper
from crispy_forms.layout import Layout
from crispy_bootstrap5 import bootstrap5


class LoginForm(AuthenticationForm):
    def __init__(self, *args, **kwargs):
        super().__init__(*args, **kwargs)

        self.helper = FormHelper()
        self.helper.form_tag = False
        self.helper.include_media = False
        self.helper.layout = Layout(
            bootstrap5.FloatingField("username", autocomplete="username"),
            bootstrap5.FloatingField("password", autocomplete="current-password"),
        )
Here I set form_tag to False to skip the <form> tag from the rendered form elements because I want to customize it in the templates. And I set include_media to False because I want to manually handle the media inclusion, as you will see later, instead of automatically including them in the form.
The views
I will have two views:
- The home view will have a button to open a modal dialog for login.
- The login form view will handle the form and return the HTML markup for the dialog.
from django.shortcuts import render, redirect
from django.contrib.auth import login as auth_login, logout as auth_logout
from django_htmx.http import HttpResponseClientRefresh
from .forms import LoginForm


def home(request):
    if request.user.is_authenticated:
        return render(request, "dashboard.html")
    return render(request, "home.html", context)


def login(request):
    if request.method == "POST":
        form = LoginForm(request=request, data=request.POST, prefix="login")
        template_name = "login_form.html"
        if form.is_valid():
            user = form.get_user()
            auth_login(request, user)
            return HttpResponseClientRefresh()
    else:
        form = LoginForm(request=request, prefix="login")
        template_name = "login_dialog.html"
    context = {"form": form}
    return render(request, template_name, context)
The home view just returns different templates based on whether the user is logged in or not.
The login view handles a login form and renders different templates based on whether the view was accessed by GET or POST method. If the login succeeds, a special HttpResponseClientRefresh response is returned, which tells htmx to refresh the page from where the login form was loaded and submitted. It's an empty response with the HX-Refresh: true header.
Then I plug those two views into my urls.py rules.
The templates and javascript
At the end of the base.html template, I include htmx from CDN and my custom dialog.js:
<script src="https://unpkg.com/htmx.org@1.8.2" integrity="sha384-+8ISc/waZcRdXCLxVgbsLzay31nCdyZXQxnsUy++HJzJliTzxKWr0m1cIEMyUzQu" crossorigin="anonymous"></script>
<script src="{% static 'js/dialog.js' %}"></script>
In the home.html template, I add a button which will open the dialog:
<button
    data-hx-get="{% url 'login' %}"
    data-hx-target="main"
    data-hx-swap="beforeend"
    type="button"
    class="btn btn-primary"
>Log in</button>
Note that htmx allows either hx-* syntax or data-hx-* for its HTML attributes and I prefer the latter because data-* attributes make a valid HTML document.
In the snippet above, I tell htmx to load the login page on the button click and insert it before the end of the <main> HTML tag.
Let's have a look at my dialog.js file:
function init_widgets_for_htmx_element(target) {
    // init other widgets

    // init modal dialogs
    if (target.tagName === 'DIALOG') {
        target.showModal();
        htmx.on('.close-dialog', 'click', function(event) {
            var dialog = htmx.find('dialog[open]');
            dialog.close();
            htmx.remove(dialog);
        });
    }
}

htmx.onLoad(init_widgets_for_htmx_element);
Here, when a page loads or a htmx inserts a snippet, the init_widgets_for_htmx_element function will be called with the <body> or the inserted element as the target. One can use this function to initialize widgets, such as rich text fields, autocompletes, tabs, custom frontend validators, etc. Also, I use this function to open the loaded modal dialogs and add event handlers to close them.
Now the login_dialog.html template looks like this (I just stripped the styling markup):
<dialog id="htmx-dialog">
    <h1>Login</h1>
    <button type="button" class="close-dialog btn-close" aria-label="Close"></button>
    {% include "login_form.html" %}
    <button type="submit" form="htmx-dialog-form">Log in</button>
</dialog>
And the login_form.html looks like this:
<form
    id="htmx-dialog-form"
    novalidate
    data-hx-post="{% url 'login' %}"
    data-hx-swap="outerHTML"
>
    {% load crispy_forms_tags %}
    {% crispy form %}
</form>
The htmx attributes tell htmx to submit the form data to the login view by Ajax and replace the <form> HTML tag with the response received. That is used for form validation. If the response has the HX-Refresh: true header, as mentioned before, then the home page is refreshed.
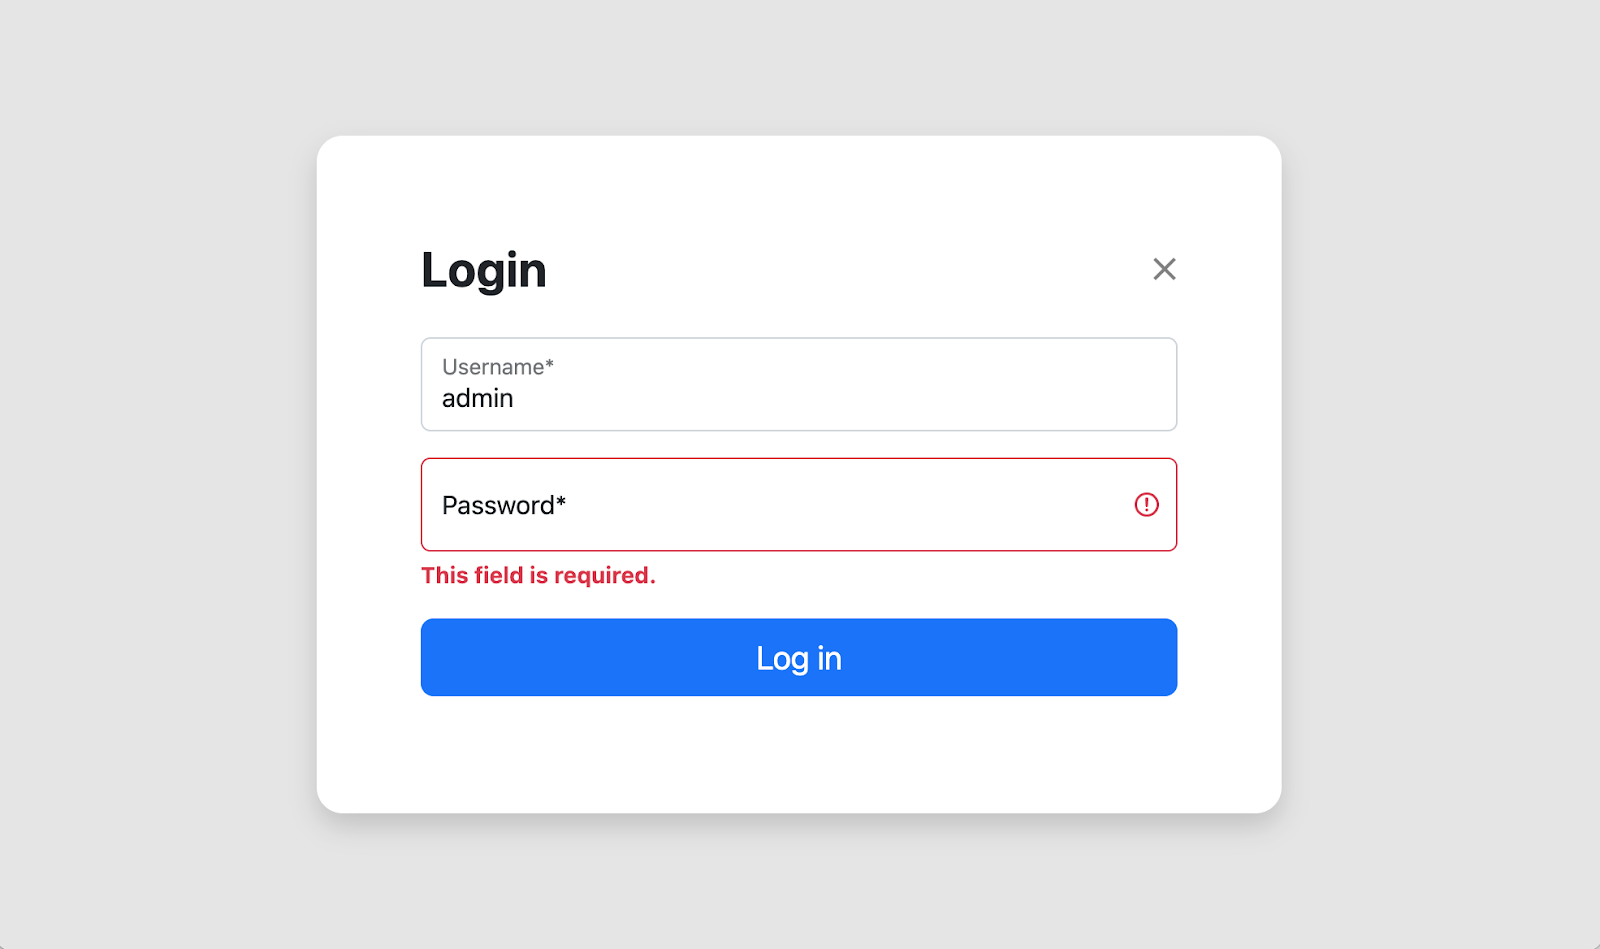
Here is what the result looks like:

The form media
If you noticed before, we excluded the media from the form. Otherwise, the home page would load the media of its own forms (for example, a search form) and the media of the dialog forms. And that would cause double executions of shared scripts, for example, the ones for autocompletes and rich text fields.
You can nicely combine media from different forms by concatenating the media instances. This way, each CSS and Javascript file is included just once.
As the login form isn't part of the home page but instead included on demand, I need to have its media in the home view or any other view where the login button is shown.
Here comes this custom context processor for help:
def login_dialog(request):
    from .forms import LoginForm

    if not request.user.is_authenticated:
        form = LoginForm(request=request)
        if hasattr(request, "combined_media"):
            request.combined_media += form.media
        else:
            request.combined_media = form.media
    return {}
It checks for any request.combined_media and attaches the form media from the login form.
Lastly, I attach this context processor to the template settings and render the value of combined media before </body>:
{{ request.combined_media }}The final words
Get the code to play with from Github. As you can see, htmx makes Ajax communications pretty straightforward, even when it's about dynamically loading and reloading parts of the content or initializing custom widgets.
Cover photo by Pixabay
